Pull external data into your register with OpenConnector
Configure a source, a mapping, and a synchronisation in OpenConnector that turn an external API into datasets, on a schedule. Every step has UI, API, and PHP tabs.
Each step below has three tabs — UI, API, and PHP — so you can
follow the click-path, automate it with curl, or call the apps' OCA\
services in code. Pick one and it sticks across every step.
This is Part 4 of the Woo tutorial series. Parts 1, 2 and 3 set up the registers, the files, and the public catalog this tutorial fills.
So far you entered datasets by hand. In production they come from another system: a case-management API, an open-data source, an existing register. In this tutorial you connect one with OpenConnector, through the interface. You build a source, a mapping, and a synchronisation, then run it. External records become datasets in your register.
As the external system we use the public Swagger Pet Store API. It stands in for your real source. The mechanics are identical whether you connect a pet store, a case system, or an open-data portal.
The three pieces
OpenConnector splits an integration into three objects. You build them in order:
- Source: where the data comes from. A base URL and how to authenticate.
- Mapping: how a record is reshaped. External fields become your schema's fields.
- Synchronisation: what runs. It pulls from a source endpoint, applies the mapping, and writes into a register and schema.
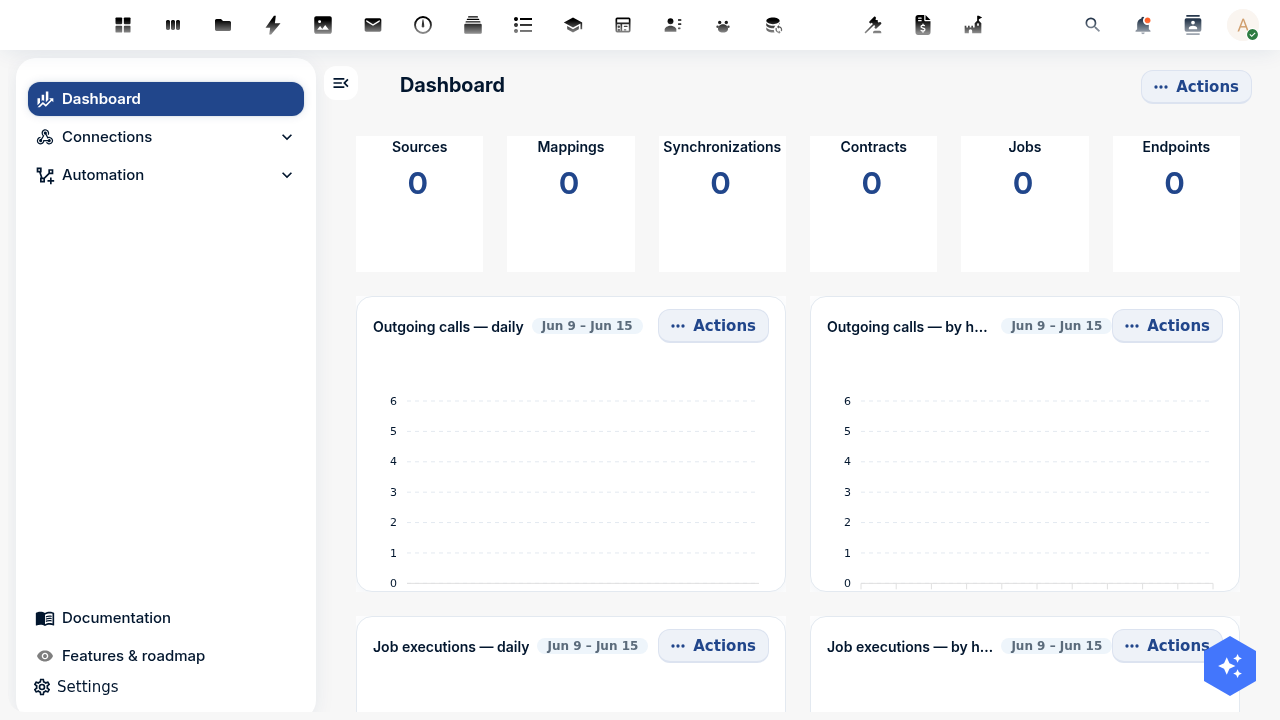
You build all three in the OpenConnector menu in Nextcloud. The dashboard counts each piece: sources, mappings, synchronisations, contracts, jobs, and endpoints.
Step 1: Register the external API as a source
- UI
- API
- PHP
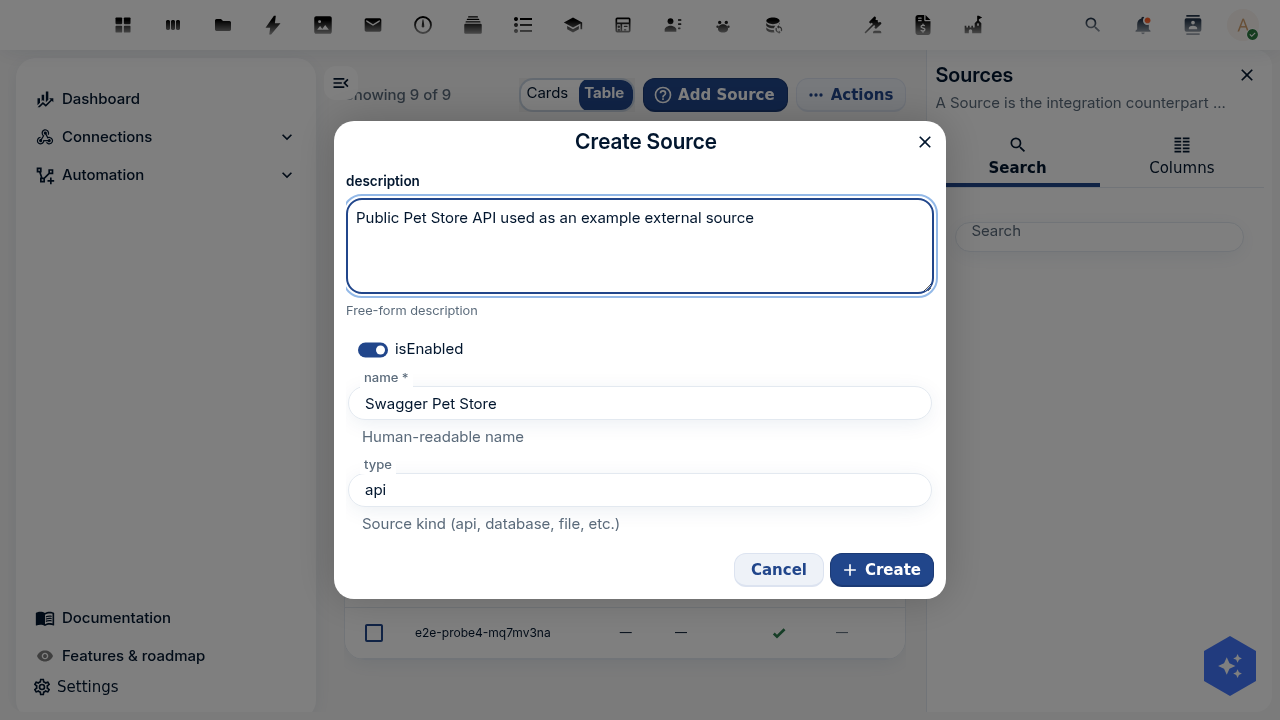
Open OpenConnector → Sources → Add source. Give it a name like Swagger Pet Store, set the type to api, and add a description. Click Create.
Open the new source from the list and set its location to the base URL, https://petstore3.swagger.io/api/v3. The Pet Store needs no authentication. Use the source's Test action to confirm OpenConnector can reach it; a green result means the connection works.
Host http://localhost:8080, auth admin:admin. Create the source, then test connectivity with its id:
curl -u admin:admin -X POST "http://localhost:8080/index.php/apps/openconnector/api/sources" \
  -H "OCS-APIRequest: true" -H "Content-Type: application/json" \
  -d '{ "name": "Swagger Pet Store", "type": "api", "location": "https://petstore3.swagger.io/api/v3", "auth": "none", "isEnabled": true }'

curl -u admin:admin -X POST "http://localhost:8080/index.php/apps/openconnector/api/sources/test/<SOURCE_ID>" \
  -H "OCS-APIRequest: true"
A source, mapping, and synchronisation are all OpenRegister objects in the openconnector register, so you create them with OpenRegister's ObjectService and test reachability with OpenConnector's CallService:
use OCA\OpenRegister\Service\ObjectService;
use OCA\OpenConnector\Service\CallService;

$objects = \OCP\Server::get(ObjectService::class);

$source = $objects->saveObject(
    object: [
        'name'      => 'Swagger Pet Store',
        'type'      => 'api',
        'location'  => 'https://petstore3.swagger.io/api/v3',
        'auth'      => 'none',
        'isEnabled' => true,
    ],
    register: 'openconnector',
    schema:   'source',
);

// Confirm OpenConnector can reach it.
$call     = \OCP\Server::get(CallService::class);
$response = $call->call($source, '/pet/findByStatus?status=available');
For a real source you set the authentication and add credentials on the source. Keep secrets out of any file you commit; OpenConnector stores them encrypted.
Step 2: Write the mapping
A mapping turns one external record into one object in your schema. Each target field is a Twig expression that reads from the source record.
The Pet Store returns pets like this:
{ "id": 7, "name": "Bella", "status": "available", "category": { "name": "Dogs" } }
Map those fields onto your Dataset schema:
| Dataset field | Expression |
|---|---|
title | {{ name }} |
category | {{ category.name }} |
status | Published |
publicatiedatum | {{ "now"|date("Y-m-d H:i:s") }} |
The publicatiedatum expression sets the publish date to now, so the dataset is public the moment it arrives. This is the field Part 3 keys public visibility on.
- UI
- API
- PHP
Open OpenConnector → Mappings → Add mapping, give it a name like Pet to dataset, and open it. Enter each row from the table above as a target field and its Twig expression. Use the mapping's Test mapping action to run it against a sample record before you wire it up — it shows the reshaped object, so you know the mapping does what you expect.
curl -u admin:admin -X POST "http://localhost:8080/index.php/apps/openconnector/api/mappings" \
  -H "OCS-APIRequest: true" -H "Content-Type: application/json" \
  -d '{ "name": "Pet to dataset", "mapping": {
        "title": "{{ name }}", "category": "{{ category.name }}", "status": "Published",
        "publicatiedatum": "{{ \"now\"|date(\"Y-m-d H:i:s\") }}" } }'

curl -u admin:admin -X POST "http://localhost:8080/index.php/apps/openconnector/api/mappings/test" \
  -H "OCS-APIRequest: true" -H "Content-Type: application/json" \
  -d '{ "mapping": { "title": "{{ name }}" }, "inputObject": { "name": "Bella" } }'
use OCA\OpenConnector\Service\MappingService;

$mapping = $objects->saveObject(
    object: [
        'name'    => 'Pet to dataset',
        'mapping' => [
            'title'           => '{{ name }}',
            'category'        => '{{ category.name }}',
            'status'          => 'Published',
            'publicatiedatum' => '{{ "now"|date("Y-m-d H:i:s") }}',
        ],
    ],
    register: 'openconnector',
    schema:   'mapping',
);

// Reshape one sample record to verify the mapping before wiring it up.
$mapper = \OCP\Server::get(MappingService::class);
$result = $mapper->executeMapping($mapping, ['name' => 'Bella', 'category' => ['name' => 'Dogs']]);
Step 3: Create the synchronisation
The synchronisation ties source, mapping, and target together. It needs:
- Source: the Pet Store source from Step 1.
- Source endpoint:
/pet/findByStatus?status=available, the path appended to the source location. - Results position: where the list of records sits in the response. The Pet Store returns a bare array, addressed as
_root. - Id position:
id, the field that uniquely identifies a record. OpenConnector uses it to avoid duplicates on the next run. - Mapping: the
Pet to datasetmapping from Step 2. - Target: your DCAT register and its
Datasetschema.
- UI
- API
- PHP
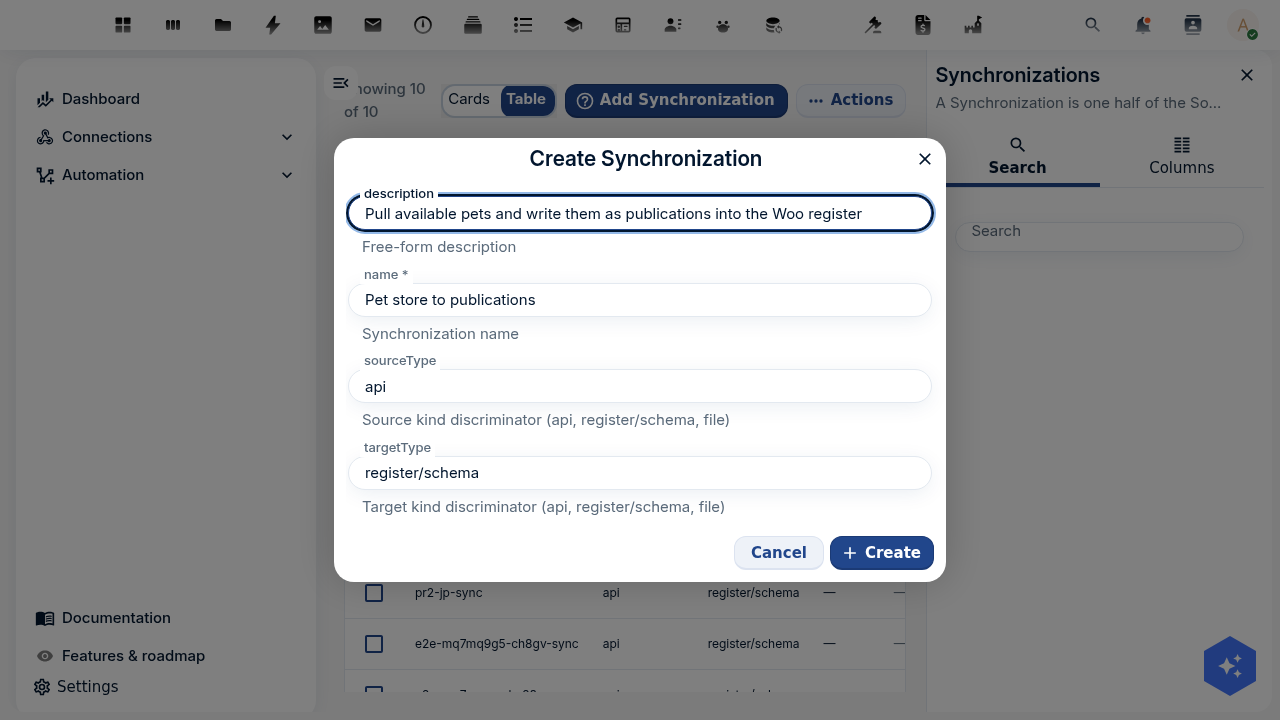
Open OpenConnector → Synchronisations → Add synchronisation. Name it, set sourceType to api and targetType to register/schema, and click Create.
Open the synchronisation and fill the fields above from the dropdowns.
Replace <REGISTER>/<SCHEMA> with your DCAT register and Dataset schema:
curl -u admin:admin -X POST "http://localhost:8080/index.php/apps/openconnector/api/synchronizations" \
  -H "OCS-APIRequest: true" -H "Content-Type: application/json" \
  -d '{ "name": "Pet store to datasets", "sourceId": "<SOURCE_ID>", "sourceType": "api",
        "sourceTargetMapping": "<MAPPING_ID>",
        "sourceConfig": { "endpoint": "/pet/findByStatus?status=available", "idPosition": "id", "resultsPosition": "_root" },
        "targetType": "register/schema", "targetId": "<REGISTER>/<SCHEMA>" }'
$sync = $objects->saveObject(
    object: [
        'name'                => 'Pet store to datasets',
        'sourceId'            => $source->getUuid(),
        'sourceType'          => 'api',
        'sourceTargetMapping' => $mapping->getUuid(),
        'sourceConfig'        => [
            'endpoint'        => '/pet/findByStatus?status=available',
            'idPosition'      => 'id',
            'resultsPosition' => '_root',
        ],
        'targetType'          => 'register/schema',
        'targetId'            => '<REGISTER>/<SCHEMA>',
    ],
    register: 'openconnector',
    schema:   'synchronization',
);
Step 4: Run it
- UI
- API
- PHP
Run the synchronisation from its detail view with the Run action. The result is a log: how many records it read, created, updated, and skipped.
curl -u admin:admin -X POST "http://localhost:8080/index.php/apps/openconnector/api/synchronizations/<SYNC_ID>/run" \
  -H "OCS-APIRequest: true"
The run returns a log like { "result": { "objects": { "found": 8, "created": 8 } } }.
use OCA\OpenConnector\Service\SynchronizationService;

$syncService = \OCP\Server::get(SynchronizationService::class);
$log = $syncService->synchronize($sync);
// $log['result']['objects'] === ['found' => 8, 'created' => 8]
Open your DCAT register in OpenRegister and you see the new datasets. Because the mapping set publicatiedatum to now, they are already public. Read them anonymously through the catalog from Part 3 (/api/publications). The external records are now datasets, searchable and harvestable.
Step 5: Schedule it
A synchronisation that runs once is an import. To keep the register current, schedule it. In the synchronisation detail view, set a schedule. OpenConnector registers a background job — its JobTask cron runs the same synchronize() on the interval you pick. Scheduling is its own object, so unlike the steps above it has no one-line API/PHP equivalent; create it from the UI.
On the next run, OpenConnector compares each record's id against what it already wrote. New records are created, changed records are updated, and unchanged records are skipped. The register tracks the source without duplicates.
Match the interval to how often the source changes. A daily open-data export does not need an hourly sync. Frequent runs against a slow API waste both sides.
Test yourself
The synchronisation runs but creates zero objects. Where do you look first?
The results position. If it does not point at the list of records in the response, OpenConnector finds nothing to process. Open the source endpoint in a browser and check where the array sits.
You run the same synchronisation twice. Why are no duplicates created?
The id position. OpenConnector reads the record's id and matches it against what it already wrote. The second run updates or skips, it does not create again.
Records arrive but never show in public search. What did the mapping miss?
publicatiedatum. Without a date that is now or earlier, the publish rule from Part 3 hides the dataset from anonymous visitors. Set it in the mapping.
Where to go from here
You have a full chain: an external API feeds your register, a catalog publishes it, and a DCAT-AP-NL feed makes it harvestable. New records flow in on a schedule.
From here you can add a second source, write a richer mapping with conditions, or attach files to each dataset as Part 2 showed. The OpenConnector documentation covers sources with authentication, rules, and error handling in depth.